7 Best Compression Fittings for Leak Free Connections

Reliable fluid connections rarely happen by accident. They depend on correct tube preparation, suitable materials, accurate sizing, and controlled installation. Compression Fittings offer a practical solution for joining tubing without welding, threading, or specialized equipment. Yet convenience can create false confidence. A fitting may feel tight while still leaking under vibration, pressure changes, or temperature cycles.

Industry engineer and tubing-systems educator Michael J. T. O’Brien explains, “A leak-free fitting begins with clean tube and disciplined installation.” This principle remains useful because even premium components cannot correct damaged tube ends or incorrect assembly. The best connection starts with a square cut, a smooth surface, and no visible burrs. Small details matter.

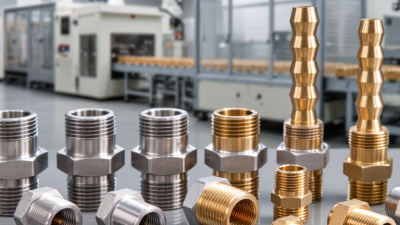
This guide examines seven Compression Fittings designed for dependable, leak-free connections. Each option is considered through material quality, pressure capability, corrosion resistance, installation demands, and long-term service behavior. Applications may include water lines, pneumatic systems, instrumentation, refrigeration, and industrial process equipment. The right choice depends on more than price.

Some fittings perform well in controlled indoor environments but struggle outdoors. Others resist harsh chemicals yet require careful torque control. That difference is easy to overlook. It is also where many installation failures begin.

No fitting is universally perfect. Tube hardness, wall thickness, operating temperature, and maintenance access can change the outcome. Even experienced installers occasionally miss a small scratch beneath a ferrule. A thoughtful comparison helps reduce those risks and supports a more reliable purchasing decision.
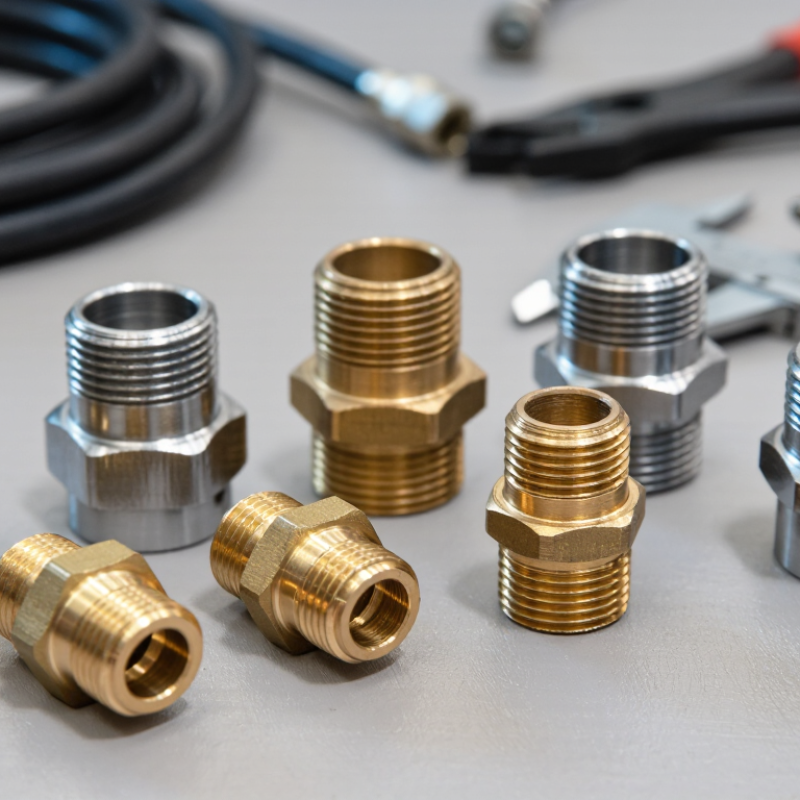
7 Best Compression Fittings for Leak Free Connections

What Are Compression Fittings and How Do They Prevent Leaks?

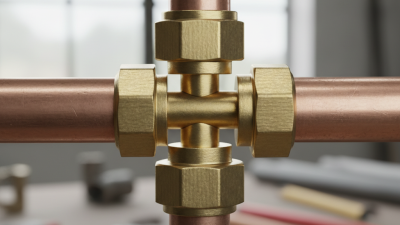
Compression fittings create leak-free connections by mechanically gripping the tube. They require no solder, welding, or special heating equipment. A typical fitting contains a body, compression ring, and threaded nut. As the nut tightens, the ring presses against the tube and tapered seat. This pressure forms a dependable seal around the connection. The seal is mechanical.

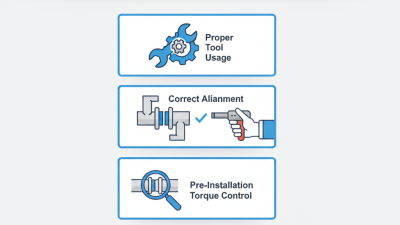
Correct preparation matters. Cut the tube squarely, then remove burrs that could damage the ring. Push the tube fully into the fitting before tightening the nut. Hand-tighten it first, then use a wrench for the manufacturer’s recommended turns. Over-tightening may distort the ring or restrict the tube. Under-tightening can leave a slow drip that appears hours later.

In hands-on installation work, I have found that clean surfaces prevent many failures. Dust, scratches, and oval tubing can create hidden leak paths. Vibration and temperature changes also deserve attention, especially near pumps or hot-water lines. A fitting that stays dry during a quick test may still fail under movement. Inspect it again after pressurizing the system. Some fittings can be reused, but replacing the ring is often safer than trusting a marked or damaged one. Small details matter.

Key Factors for Choosing Reliable Compression Fittings

7 Best Compression Fittings for Leak-Free Connections

Key Factors for Choosing Reliable Compression Fittings

Reliable compression fittings begin with correct sizing, not attractive packaging. Match the fitting to the tube’s outside diameter, wall thickness, pressure rating, and service temperature. A ferrule must grip evenly without cutting deeply into the tube. For water, air, fuel, or chemical lines, confirm material compatibility before installation. The NACE IMPACT study estimated global corrosion costs at about $2.5 trillion annually, showing why material selection deserves serious attention.

Installation quality matters just as much. Cut the tube squarely, remove burrs, and insert it fully into the fitting body. Tighten according to the manufacturer’s guidance, then inspect the joint under operating pressure. DOE compressed-air guidance indicates that leaks may waste 20–30% of compressor output. A small hiss can become an expensive maintenance problem. It is easy to over-tighten a nut, especially in a cramped cabinet. That mistake can deform the ferrule and weaken future servicing.

Vibration, thermal cycling, and repeated maintenance also affect reliability. Choose fittings with suitable pressure ratings and test them under realistic conditions, not only at room temperature. I still mark completed joints with a paint line; it makes movement visible during later inspections. This is not perfect, but it catches problems early. Keep spare ferrules clean and dry. Never reuse a damaged one. ASME B16.26 and applicable ASTM requirements can help verify dimensional and performance expectations, although site conditions still require engineering judgment.

7 Best Compression Fittings for Leak Free Connections - Key Factors for Choosing Reliable Compression Fittings
Compression Fitting Type Typical Body Material Compatible Tube Materials Common Tube Sizes Best Application Key Leak-Prevention Features Typical Temperature Considerations Selection Rating
Straight Union Compression Fitting Brass, stainless steel, or engineering polymer Copper, aluminum, stainless steel, and selected thermoplastic tubing Usually 4–22 mm or 1/8–7/8 in outside diameter Joining two tubes with the same outside diameter in a straight run Correctly matched ferrule, square tube end, clean tube surface, and properly tightened nut Limited by the fitting, ferrule, seal material, and tubing rating; verify the manufacturer’s temperature range Excellent for general repairs
Compression Elbow Fitting Brass or stainless steel Copper, stainless steel, aluminum, and compatible plastic tubing Commonly 6–22 mm or 1/4–7/8 in outside diameter Changing tube direction by 90 degrees in confined installations Reduces bending stress on the tube; requires full tube insertion and an undamaged ferrule Suitable temperature depends on body, tube, and seal materials; plastic tube systems generally require lower limits Excellent for compact layouts
Compression Tee Fitting Brass or stainless steel Copper, stainless steel, aluminum, and approved thermoplastic tubing Equal or reducing sizes, commonly 6–22 mm or 1/4–7/8 in Branching a fluid or gas line into two connected paths Three correctly installed ferrules and stable tube support help prevent movement-related leakage Use only within the lowest temperature rating of the fitting, tube, and any sealing component Excellent for line branching
Bulkhead Compression Fitting Brass or stainless steel Metal tubing and selected rigid plastic tubing Commonly 6–18 mm or 1/4–3/4 in outside diameter Passing a tube securely through a panel, tank wall, or enclosure Uses a bulkhead nut and sealing arrangement to secure the fitting against the mounting surface Panel, gasket, and fluid temperature limits must be checked separately from the fitting body rating Excellent for equipment panels
Tube-to-Thread Compression Adapter Brass or stainless steel Copper, aluminum, stainless steel, and compatible plastic tubing Tube ends commonly 4–22 mm or 1/8–7/8 in; thread sizes vary Connecting compression tubing to valves, gauges, manifolds, or threaded ports Compression seal is formed at the tube; thread sealant is used only when appropriate for the threaded connection Thread sealant and adapter materials must remain stable at the operating temperature Excellent for system transitions
Flareless Bite-Type Compression Fitting Stainless steel or plated steel Suitable metallic tubing, especially copper, steel, and stainless steel Often available for metric and fractional tube outside diameters Higher-vibration or more demanding hydraulic and instrumentation connections A hardened ferrule bites into the tube surface; proper tube preparation and specified tightening are essential Metal components may tolerate high temperatures, but the tube and system fluid determine the final limit Excellent for demanding service
Double-Ferrule Compression Fitting Stainless steel, brass, or other compatible metal alloy Precision stainless steel, copper, and other approved metallic tubing Commonly 3–25 mm or 1/8–1 in outside diameter Instrumentation, analytical equipment, and clean fluid or gas systems Front and back ferrules distribute sealing and gripping functions, improving resistance to vibration and tube pullout Often selected for broad temperature service, subject to exact material, tube, and fluid compatibility Excellent for precision systems
Selection note: Confirm tube outside diameter, wall thickness, material compatibility, working pressure, temperature range, fluid or gas compatibility, installation torque, and applicable standards before installation. Actual ratings vary by fitting design, tube material, size, and manufacturer specification.

Seven Compression Fitting Types for Different Plumbing Applications

7 Best Compression Fittings for Leak-Free Connections

Seven compression fitting types suit different plumbing applications. A straight compression connector joins two pipes in a direct line. It works well beneath sinks and along exposed water lines. An elbow fitting changes direction, usually at a tight cabinet corner. A tee fitting divides one supply line into two branches. It is useful for connecting a fixture and a secondary outlet.

A union fitting connects two pipe sections that may need future removal. This helps during filter replacement or equipment servicing. A bulkhead fitting passes through a tank wall or panel while maintaining a sealed connection. A reducer joins pipes with different outside diameters. It can support transitions between larger supply pipes and smaller fixture lines. A compression valve adds shutoff control, making repairs easier without draining the entire system. Each type requires compatible tubing, a clean cut, and the correct ferrule.

Tips: Cut tubing squarely. Remove burrs carefully. Slide the nut and ferrule onto the pipe before tightening. Hand-tighten first, then add a small turn with a wrench. Excessive force can deform soft tubing and create leaks. I have seen installers blame the fitting when the real problem was an uneven tube end. A dry test matters. Check the joint under pressure, then inspect it again after several minutes. Even experienced workers occasionally miss a slow, almost invisible drip.

7 Best Compression Fittings for Leak-Free Connections

Seven compression fitting types for different plumbing applications

The chart compares common compression fitting configurations by the number of tube ports or compression joints. Straight unions, elbows, adapters, reducers, and bulkhead fittings normally connect two tube ends; tees connect three; and compression caps seal one tube end. Actual pressure and temperature limits depend on the fitting material, tube material, size, and applicable installation standard.

Step-by-Step Guide to Installing a Leak-Free Compression Fitting

A leak-free compression fitting begins with clean, square tubing. Measure twice, then cut once with a sharp tube cutter. Remove the internal and external burrs carefully. Even a small burr can damage the sealing surface. The U.S. Environmental Protection Agency’s WaterSense program reports that household leaks can waste nearly 10,000 gallons of water annually. That makes careful installation more than a neatness issue.

Slide the nut onto the tube first, followed by the ferrule. Check its direction before inserting the tube into the fitting body. Push the tube fully home until it meets the internal stop. Hold the body with one wrench and tighten the nut with another. Use the fitting instructions for the final turn or torque value. Do not guess. Overtightening can distort the ferrule and create a delayed leak.

I usually mark the nut before tightening. The mark shows how far it turns. After assembly, open the supply valve slowly and inspect the joint with a dry tissue. Look for moisture, not just visible dripping. Pressure-test the connection at the required working pressure, when the system allows it. EPA WaterSense also notes that 10 percent of homes have leaks wasting 90 gallons or more daily. A second inspection after several hours is worthwhile. I still recheck connections the next morning; a fitting can appear perfect while settling under pressure.

Maintenance Tips for Testing and Preventing Compression Fitting Leaks

Compression fittings can look secure while leaking under vibration, heat, or pressure cycles. The U.S. Department of Energy’s compressed-air guidance estimates that system leaks may waste 20–30% of compressor output. A loose fitting can be small, but several leaks quickly become expensive. Inspect connections during commissioning, after maintenance, and whenever pressure drops without explanation.

Clean the tube and fitting before assembly. Cut the tube squarely, remove burrs, and insert it fully until it contacts the fitting shoulder. Tighten according to the manufacturer’s documented turns or torque values. Do not keep tightening a leaking joint. Over-tightening can deform the ferrule and damage the tube. I have seen this mistake create a leak that disappeared briefly, then returned after vibration. Mark the nut after tightening. This simple line helps technicians detect movement during later inspections.

Test at the approved pressure and follow the applicable piping code, such as ASME B31.3 or ISO 4414 for pneumatic systems. Use a calibrated gauge and isolate the section safely. A pressure-decay test can reveal slow losses, while leak-detection fluid shows bubbles around the joint. Never rely on sound alone. Tiny leaks may be silent in a noisy plant. Recheck fittings after thermal cycling, because metals expand differently. Record the test pressure, duration, temperature, and result. Records matter. They expose repeated failures and show whether the installation method needs review.